A lot of homeowners normally ask if it is possible to change hardwood flooring color. And the answer is a resounding YES!
You heard it right! You can change the color of your hardwood through floor sanding and refinishing. Typically, most solid hardwood floors can be refinished 4 to 5 times to restore their look and keep them in great shape. As part of the hardwood refinishing process, you can go light to dark tones, red or gray, and everything in between. In fact, this is one of the most inexpensive ways to spruce up your floor without the need to replace the entire hardwood flooring. But before you decide to change hardwood flooring color, make sure to understand some important aspects of the process, so you won’t end up damaging your floor. Take this simple guide to start changing the color of your hardwood floor.
The Process of Changing Hardwood Flooring Color
We can’t talk about changing your hardwood flooring color without discussing the entire hardwood refinishing process. You need to know when the right time is and which part of the process you should incorporate the color of your choice. Here are the steps to change the color of your hardwood flooring.

1. Select a New Floor Color
When choosing which color is best for your hardwood flooring, here are some helpful tips.
Consider Sunlight Exposure. Depending on the type of hardwood species you have, exposure to sunlight can either darken or lighten your hardwood floor. UV light can damage the appearance of your wood floor, particularly when you are in an area that receives a lot of natural light. Though window treatment can reduce sun exposure, it would be helpful to talk to a local hardwood floor specialist about it.
Use Light Colors. If your hardwood floor is laid on a smaller room or area of the house, it is best to choose light colors. Pale, light colors such as off-white or beige are ideal choices to make your room larger and more spacious. You can also opt for a natural color to achieve a light-colored hardwood floor.
Use Dark Colors. Dark-colored wood species typically last longer than light-colored hardwood because it easily absorbs sunlight, so it gets less damage from the sun. The same is true if you apply dark colors on your hardwood flooring. Dark colors tend to hide dirt and scratches better than lighter wood floors.
Ask For Samples. When you schedule a free in-home consultation with a local hardwood floor contractor, do not forget to always ask for samples. This way, you will know exactly what color will complement any décor inside your home.
2. Always Clean The Floor
Before you start changing your hardwood flooring color, you must clean the room first. Make sure to consider the following items below when cleaning the project area:
Nails And Staples. Keep in mind that in refinishing hardwood floors, the project area should be clear from any impediments including nails and staples. This is particularly important if you want to transition your floor from carpet to hardwood. Nails and staples can destroy the integrity of the sandpaper when you start sanding your hardwood floor. To guarantee that the floor is smooth and level, drive the nails down.
Furniture. Another way to clear out the room is by removing all the furniture therein. Typically, wet stain finish can ruin your furniture, so might as well remove them before you start refinishing your floor.
Doors. You need to have a smooth surface when you start sanding the floor; hence, you should take your door off its hinges. Doing so won’t cause interruption when you sand and finish your hardwood flooring.
3. Start Sanding The Floor
You need to sand your hardwood floor three times: first with a coarse grit, second with medium grit, and lastly with a finer grit. A random orbital sander is recommended to use in hardwood floor sanding. Follow these steps to sand down your floor:

Start Sanding. Don’t let your sanding equipment remain in one spot or area for too long to prevent damaging your floor. Once you turn on the equipment, move it along the grain of the hardwood panels. Always remember to sand the hardwood floor uniformly and properly.
First Sanding Pass. Your main goal for the first sanding pass is to get rid of the existing hardwood floor finish. You can use a drum sander for this. Start to work along the edges of the room using an edge sander.
Second Sanding Pass. For the second sanding pass, your goal is to remove the remaining finish and any scratches created during the first sanding pass. In this step, you can use an 80-grit or finer sanding paper. After the second sanding pass, the hardwood floor should look like new wood.
Third Sanding Pass. On your final sanding pass, you can use a 100-grit sanding screen on a buffer to guarantee that any scratches and blemishes are eradicated. Work back and forth to make sure that you do not leave any marks. You may also use a random orbital sander to buff the edges.
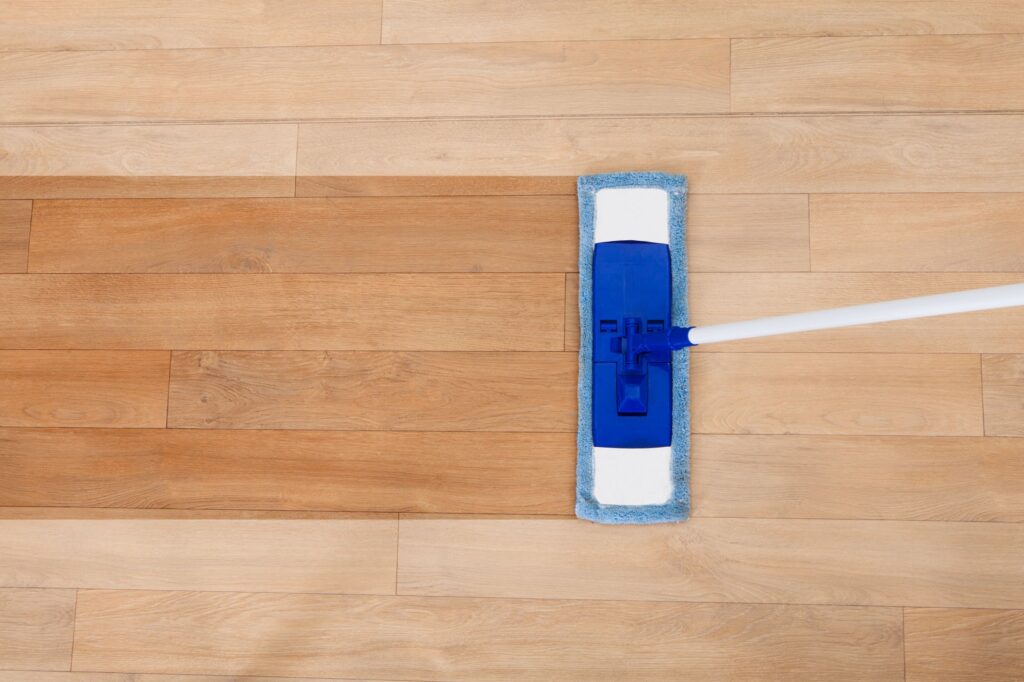
Clean-Up. Keep in mind that you should always clean the room in between each sanding. This is important to keep the level of dust lower in the project area. Use a vacuum cleaner after finishing each layer of the sanding process. Once you are done with three layers of sanding, clean the entire floor with a damp mop to absorb all residual debris.
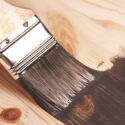
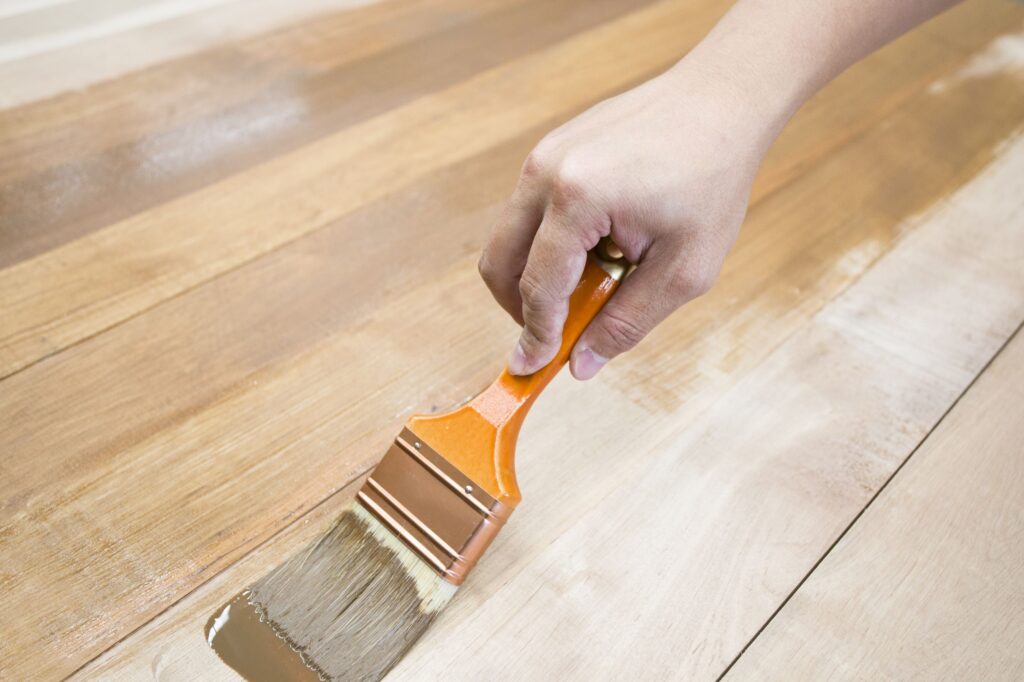
4. Stain Your Hardwood Floor
Once you’re done sanding your hardwood floor, you can now apply wood stain. This is where you can be creative in changing your hardwood flooring color. If you want to go “natural” or apply no stains, then you can move to the next step.

Stains come in varying shades, be it light or dark tones. The type of stain you apply will depend on the hardwood floor you have. You can test the stain first on your wood floor to guarantee that it is exactly the way you would like. You may also talk to a local flooring contractor about it.
5. Apply Polyurethane
After your hardwood floor is stained, you can now apply a polyurethane. Make sure that your project area is well-ventilated before applying polyurethane. Use the respiratory mask as much as possible.
Each coat of polyurethane takes approximately 24 hours to dry up. Typically, you need at least 2 to 3 coats to achieve the best results. You also have the option to choose what sheen you would like on your floor. It can be glossy, semi-glossy, matte, or satin. In between every coating, you must buff the floor to make sure that it is smooth. Buffing the floor also allows the polyurethane to absorb easily. Once you are done refinishing, and the wood finish completely dries up, you can move the furniture back.
Speak To Your Local Flooring Contractor Today
Changing your hardwood flooring color can simply spruce up your space without paying an arm and a leg. No need for repair. No need for replacement of the floor. If you want to start changing the color of your hardwood floor, call us today. Schedule a free in-home consultation, so we can bring the beauty of your hardwood flooring to the next level!